
Here’s how to activate eSIM on iPhone: connect to Wi-Fi and have your provider’s QR code or setup details ready. In Settings, choose Add a Cellular Plan, select the supplied setup method, and follow the instructions. For travel service, keep the details from SafarieSIM nearby until setup is complete.
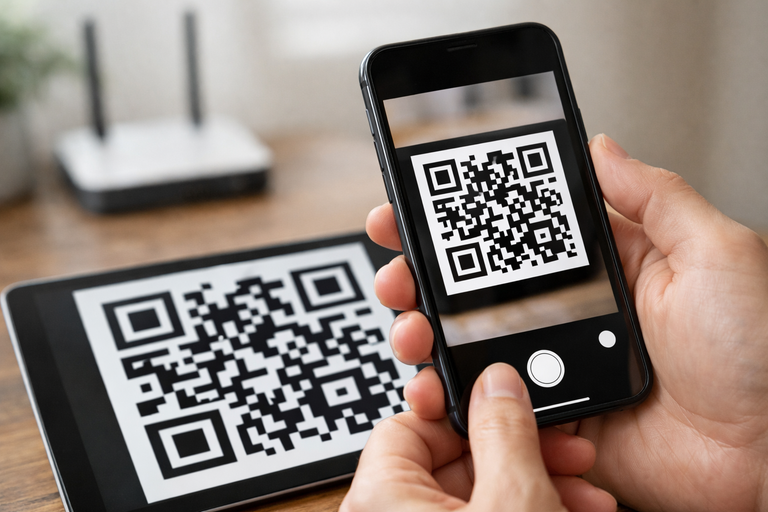
Keep the eSIM QR code on another screen and connect your iPhone to Wi-Fi before setup.
Before starting, connect to Wi-Fi and have your activation code or QR code ready.
If you’re setting up a travel eSIM, keep the details from SafarieSIM close by so you can finish setup in a few minutes.
Most models released from the XS and XR generation onward support eSIM.
Compatibility can vary by country, sales region, and carrier, so confirm the exact model number under Settings > General > About before purchasing a plan.
Some devices sold for mainland China use two physical SIM cards instead of eSIM, while certain Hong Kong and Macao variants also differ.
Which Models Support eSIM?
Instead of assuming eSIM support from the model name alone, check the exact model number under Settings > General > About. Regional rules often override the general pattern: some devices sold for mainland China use two physical SIM cards instead, and certain Hong Kong and Macao variants differ as well. A carrier may also impose extra setup requirements even when the phone itself is compatible, and the device must be unlocked if you intend to install an embedded SIM from a different provider.
Model family | eSIM support |
|---|---|
XS family and XR | Yes, with regional exceptions |
11 family, including Pro models | Yes |
SE, 2nd and 3rd generations | Yes |
12 and 13 families, including mini and Pro models | Yes |
14, 15, and 16 families | Yes; physical SIM availability varies by region |
Some devices sold for mainland China use two physical SIM cards instead of embedded SIM technology, while certain Hong Kong and Macao variants also differ. A service provider may impose additional setup requirements even when the device itself is compatible. Owners of the 11 series can review this model-specific eSIM compatibility guide for more detail. Also make sure the phone is unlocked if you intend to install an embedded SIM from a different provider.
What Do You Need Before Activating an eSIM?
Before you activate an eSIM, confirm that your phone supports the service and is not locked to a different provider. Update the device software if an update is available, charge the battery, and connect to a reliable Wi-Fi network. Internet access is usually required while the phone downloads and registers the cellular service.
Keep the activation information from your eSIM provider nearby. Depending on the provider, this may include:
A QR code: Display it on another device or print it so your phone’s camera can scan it.
Manual setup details: Have the activation code and server address ready if QR scanning is unavailable.
Your account information: You may need an email address, order number, verification code, or provider login.
Your current SIM details: Keep them available if you are transferring an existing number rather than adding a separate travel plan.
Do not remove your physical SIM unless your provider specifically instructs you to. Many phones can keep both lines installed, allowing you to choose one for calls and another for cellular data. For the full setup sequence, follow this guide on how to activate an eSIM.
Which eSIM Setup Method Should You Use?
Use the method provided by your network operator or travel eSIM provider. A QR code is usually the simplest choice for new service, while transfer is designed for moving an existing line from a nearby compatible phone. The full setup walkthrough explains what to expect after installation.
Method | Best for | What you need |
|---|---|---|
QR code | Installing a newly purchased plan | The provider’s QR code, displayed on another screen or printed |
Transfer | Moving an active number between compatible phones | Both devices nearby and the previous phone available for approval |
Provider app | Plans installed directly after purchase | The provider’s app and your account login |
Manual entry | When scanning fails or no QR code is supplied | An SM-DP+ address and, when required, an activation code |
In the Settings app, tap the option for adding an eSIM, then choose the matching setup method. If using a provider app, tap its install or activate control instead. Do not select manual entry unless you received the exact details; a mistyped address or code can prevent the profile from downloading.
Step-by-Step: Add Your eSIM With a QR Code
Keep the QR code open on another screen or print it before starting. Your phone cannot scan a code displayed on its own screen. Connect to Wi-Fi, then follow these steps:
Open Settings and select Cellular or Mobile Data.
Point the camera at the complete QR code. Keep the phone steady and make sure all four corners of the code are visible.
When the cellular plan appears, select Continue or Add Cellular Plan.
Wait for installation to finish. Do not close Settings, restart the phone, or disconnect from Wi-Fi during this step.
Assign the new line a clear label, such as Travel or the destination name. Then choose which line should handle cellular data.
The eSIM may show as installed before it connects to a network. If the plan is intended for travel, leave it installed and switch it on when you reach the covered destination. Review this setup guide if you need help with the remaining line and data settings.
How Do You Manually Add an eSIM?
Manual entry is useful when your provider gives you activation details instead of a scannable QR code. To activate an eSIM this way, keep the SM-DP+ address, activation code, and any confirmation code available. Enter each value exactly as supplied; an extra space or incorrect character can prevent installation.
Open Settings and tap Cellular or Mobile Data.
At the bottom of the scanner screen, select Enter Details Manually.
Type or paste the SM-DP+ Address and Activation Code.
Enter the confirmation code only if your provider supplied one, then tap Next.
Wait for the cellular plan to download, then follow the prompts to label the line and choose its preferred use.
If the details are rejected, compare every letter, number, and symbol with the original message. Do not repeatedly guess the code, as some activation credentials can be used only once. If the plan was previously installed on another device, contact the provider before trying again.
After adding the eSIM, open Settings > Cellular and give each line a clear label, such as Home, Travel, or Work. Labels help you distinguish the digital line from a physical SIM card when placing calls, sending messages, or changing data settings. They are only organizational names and do not change your plan or phone number. If you add a second digital line later, descriptive labels become especially useful.
Next, choose your Default Voice Line. Use your regular line if you want outgoing calls and messages to come from your usual number. You may also select a preferred line for individual contacts. Then open Cellular Data and choose the eSIM if it provides your travel data. Turn off Cellular Data Switching if you do not want the phone to use your other line when the travel line’s signal weakens.
Finally, select your regular line and disable Data Roaming when traveling, then enable it for the travel eSIM only if your provider’s instructions require it. These settings complete the practical configuration after you activate the digital line.
How Can You Confirm That Your eSIM Is Active?
Open Settings > Cellular and look under your installed SIMs. The new plan should appear with the label you selected, and its status should be turned on. Select the plan, tap its settings, and confirm that Turn On This Line is enabled. If an activation prompt remains on screen, tap Continue and wait for the process to finish. This confirms that the plan has been added digitally, but you should also test its connection.
Turn off Wi-Fi, make sure the new eSIM is selected for cellular data, and open a webpage. A successful load shows that mobile data is working. You should also see signal bars and a network name in the status area. If the plan includes calls or texts, place a short call or send a test message; data-only travel plans will not support these features.
If the line shows Activating, No Service, or no network after several minutes, restart the device and check that airplane mode is off. Then review the installation details in this eSIM activation guide before contacting the plan provider.
Why Is Your eSIM Stuck Activating or Showing No Service?
The new line may remain on Activating when the phone lacks a stable internet connection, the carrier has not finished provisioning the line, or a travel plan cannot connect until you reach its covered destination. Keep the activation screen open for a few minutes, connect to reliable Wi-Fi, and confirm that airplane mode is off. Then open Settings, choose Cellular or Mobile Data, select the new line, and make sure Turn On This Line is enabled. If needed, review the complete eSIM activation steps before troubleshooting further.
For device-specific assistance, contact Apple Support.
If the line shows No Service, restart the phone, then switch airplane mode on for about 10 seconds and off again. For an international travel eSIM, screen tap the new plan and enable Data Roaming if the provider’s instructions require it. Leave network selection on Automatic unless your provider specifies a particular network. Also confirm that the plan is valid for your current country and has not expired.
Do not delete the installed line immediately: some QR codes or activation codes can be used only once. If service still does not appear, contact the eSIM provider and share the exact on-screen message, your location, and the line’s status.
Why Is eSIM Transfer Not Supported, and What Can You Do?
When eSIM transfer is not supported, check whether both devices, your carrier, and your cellular plan support direct transfer. If they do not, contact the carrier and request another activation method, such as a QR code or carrier app. Keep the existing eSIM active until the replacement works, then test calls, messages, and cellular data before removing the old profile.
Troubleshooting an Unsupported eSIM Transfer
Your eSIM transfer may not be supported because direct device-to-device transfer depends on your carrier, plan, account status, and both phones’ compatibility. The option can also fail if the old phone is unavailable, the new phone is carrier-locked, the devices use different carrier accounts, or your plan requires a newly issued eSIM rather than transferring the existing profile.
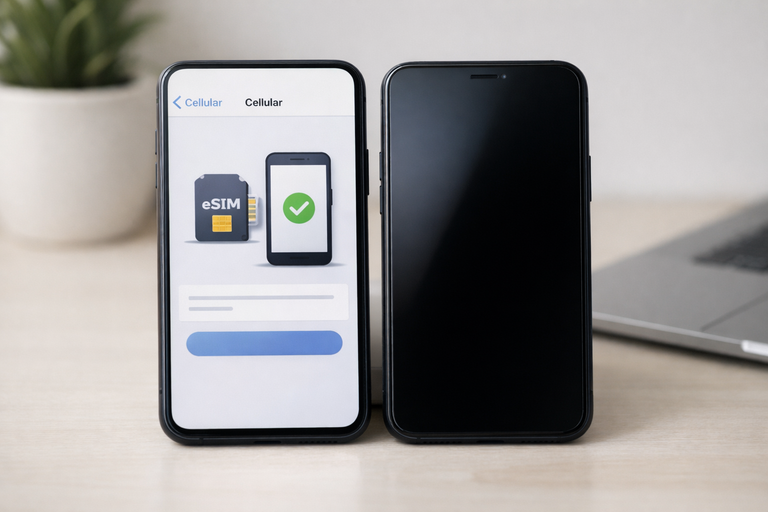
Two phones during eSIM transfer troubleshooting
An unsupported transfer does not necessarily mean your new phone cannot use embedded SIM service. Ask your network operator or eSIM provider for a fresh QR code or manual setup details. Then add the digital line through the phone’s cellular settings, following the on-screen prompts. Some QR images work only once, so request a replacement if the original credential has already been scanned.
Keep the old line active until the new eSIM connects and can place calls or use cellular data. Do not erase the old phone or delete its eSIM prematurely; deletion can remove the profile without making it available for reuse. If activation still fails, confirm that the account information matches and ask the provider to release or reissue the line.
You can keep your regular physical SIM active for calls and text messages while using a travel eSIM for cellular data. In Settings, open Cellular or Mobile Data and confirm that both lines are turned on. Choose your physical SIM card as the default voice line, then select the travel eSIM under Cellular Data. This arrangement lets people reach your usual number without sending everyday internet traffic through your home plan.
Before departure, install an eSIM for travel in Africa while you still have reliable internet access, but activate its data connection according to the provider’s instructions. After arrival, enable data roaming only for the travel eSIM if required. Leave roaming disabled on your primary line to reduce the risk of unintended roaming charges.
When using two lines, check the line indicator before placing a call or sending an SMS. You can switch lines for an individual contact without changing the default for everyone. If coverage becomes unreliable, temporarily turn the affected line off and back on. Do not remove the eSIM unless necessary, because deletion may require a new activation code.
What Are the Disadvantages of Using an eSIM?
An eSIM is convenient, but switching phones can be less straightforward than moving a physical SIM card. Transfers depend on your carrier, plan, and device support. If automatic transfer is unavailable, you may need a new QR code or help from the carrier. This becomes particularly inconvenient if your old phone is lost, damaged, or unable to turn on.
Setup and troubleshooting also require more preparation. You may need a reliable internet connection, access to your carrier account, and another screen on which to display the QR code. If activation fails, you must open the Settings app, check the selected cellular line, and follow the onscreen instructions. Deleting an eSIM does not necessarily cancel its associated plan, and a deleted profile may not be reusable later.
Carrier support remains another limitation. Some providers or plans do not offer eSIM, while certain travel plans provide data without standard calls or text messages. Device locking can also prevent activation from another provider. Before choosing between physical SIM cards and eSIMs, confirm compatibility, transfer options, and whether you need voice and SMS service.
These quick answers cover common questions that can arise before or after an eSIM is activated on your device.
Do I need Wi-Fi to activate an eSIM?
Your device needs an internet connection to download and activate the eSIM profile. Wi-Fi is usually the safest option, especially when traveling without working cellular data. Follow your provider’s instructions and keep the connection active until activation finishes.
Can I use the same QR code again?
Many eSIM QR codes are intended for one installation only. If you delete the eSIM or the scan fails after the profile has been downloaded, request new activation details from your provider rather than repeatedly scanning the original code.
Does deleting an eSIM cancel the plan?
No. Removing an eSIM from your device typically deletes its profile but does not automatically cancel the associated service or billing. Contact the provider separately if you want to close the plan.
Can I activate the eSIM before traveling?
Usually, yes, but some travel plans begin when installed while others begin when they first connect to a supported network. Check the plan terms before activation. For broader setup guidance, use this eSIM activation guide and keep your provider’s details available until the line works.