


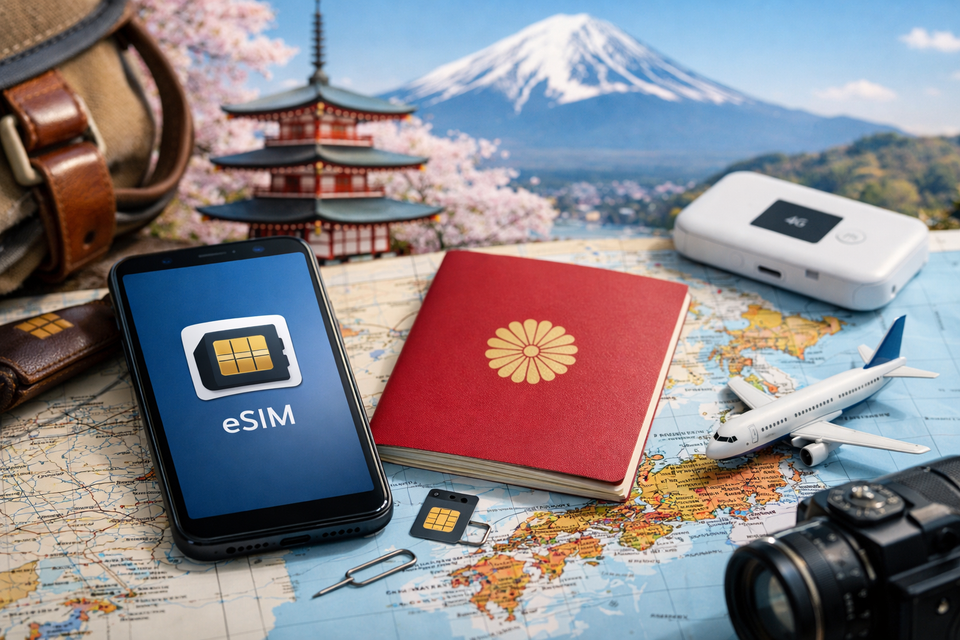
The best eSIM for Japan is one that fits your phone, your trip length, and your data habits — not simply the cheapest listing you find. Before buying, compare installation timing, network coverage, hotspot rules, plan validity, and support. You install a Japan eSIM by scanning a QR code or using an app, then switch it on when you land, so you have data before you reach the train platform.
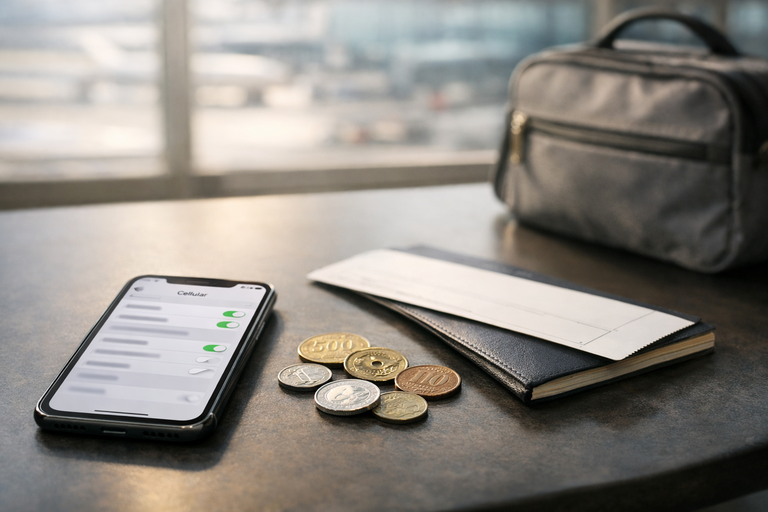
Choose and install a Japan eSIM before departure so mobile data is ready when you arrive.
A simple rule helps: short city breaks usually need modest data, while longer stays with maps, photos and video calls need more headroom. Check whether your phone is unlocked and eSIM-capable before you pay. Safari eSIM’s Japan eSIM plans, compatibility details and activation guidance are worth reviewing against that checklist.
This guide covers setup, troubleshooting, and how to choose between an eSIM and a physical SIM, so you can decide before departure rather than at the airport queue.
For most travelers, the best eSIM for Japan is the one that matches how you will actually use your phone. Before buying, confirm that your device is eSIM-ready and carrier-unlocked, that the plan covers the places on your route, and that its validity window fits your dates. A five-day city break and a three-week rail trip call for different plan types and activation timing.
When comparing plans, look at the data allowance first. A fixed plan of 3 GB to 10 GB is enough for maps, train times, messages, and light photo sharing. If you stream video, join work calls, or travel with a laptop, compare larger buckets or an unlimited data plan. With unlimited data, check hotspot rules and fair-use limits; “unlimited” may still cap tethering or slow speeds after a set amount. Also confirm whether the plan is data-only and whether you can top up.
Then match the plan to your trip. For 3–7 days, a small fixed plan usually keeps costs down. For 1–2 weeks, estimate daily use and add a buffer; 10 GB or more is safer for heavy map and photo use. For longer stays, check that the validity period covers the whole trip and that top-ups are available. If you need a local number for calls, verify that before checkout.
Installation matters too. Add the eSIM while you have reliable Wi-Fi at home, label it “Japan,” and keep the QR code or manual details. Find out when activation starts—often on first connection in Japan, not at purchase—so you do not use up days before landing. After arrival, enable the line, turn on data roaming if the provider requires it, and restart your phone if data does not connect. If it still fails, check the access point name settings and contact support with your order details; response times vary by provider and time zone.
A useful starting point is to write your own checklist before you buy: confirm the plan lists Japan coverage, note the data allowance and validity window, check hotspot rules, and find out when activation begins. Then judge any provider against those points, with your phone model and travel dates in hand, so the plan you pay for is ready when you land.
How does an eSIM work for visitors to Japan?
An eSIM is a tiny chip built into your phone that stores a downloadable mobile profile instead of a plastic card. For a Japan trip, you buy a data plan online, install the profile by scanning a QR code or through the provider's app, and it sits on your device next to your normal line. Nothing gets removed from the SIM tray, so your home number stays active for bank verification texts and calls while the eSIM handles local mobile data.
Stage | What happens |
|---|---|
Before you fly | Install the profile over stable Wi-Fi at home, label the line "Japan," and leave it switched off. |
On arrival | Turn the Japan line on, set it as your mobile data line, and enable data roaming for that line only. |
During the trip | Use maps, translation, and messaging on local data; keep your primary line for calls and texts. |
Installation is the step most people rush. Do it while you still have reliable internet, because the profile needs a connection to download, and the QR code often can't be reused later. Give the line a clear name so you don't accidentally route data through your home carrier and trigger roaming charges. Once installed, the Japan profile stays on the phone until you delete it, so you can switch it on and off as needed.
Timing matters more than most travelers expect. Some plans start counting from the moment you install, others from the first connection on a Japanese network. Check which applies before you activate anything at the airport gate. If the plan begins at first use, install at home and activate after landing; if it begins at installation, wait until the day you fly.
Expect a data-only setup on most travel plans, which means no local phone number — messaging apps, email, and web calls cover that gap. Hotspot sharing also varies by plan, so confirm it before you rely on tethering a laptop. Dual-SIM settings let you keep your usual line for incoming texts while the Japan eSIM carries the data load.
If you're comparing options, line up the data bundles and validity periods against your itinerary and phone model before buying. A five-day city trip and a three-week rail journey need very different allowances, and a plan that starts counting at installation is a poor fit for a trip booked weeks in advance. Judge each option on your own data habits rather than the biggest number on the page.
Will an eSIM Work With Your Phone in Japan?
In most cases, yes—provided your phone supports eSIM and is carrier-unlocked. Japan’s mobile networks support eSIM on compatible devices, but that does not automatically make every handset ready for a travel plan. The practical test is simple: open your phone’s cellular settings and look for an option to add an eSIM or a cellular plan. If that option is missing, or your carrier says the device is locked, a travel eSIM will not work no matter how good the plan looks.
Will my eSIM work in Japan?
It will if three things line up: the handset supports eSIM, it is unlocked, and you install and activate the profile as instructed. The download needs a steady connection, so install before you fly. On a US-to-Japan route, keep your regular SIM live for calls and texts, then point cellular access at the new line. A handset locked to a home carrier may install the profile and still fail to connect, so unlock before departure.
What should I check before buying?
Look beyond the headline data amount. Confirm the plan lists Japan coverage, check whether hotspot use is allowed if you plan to share internet with a laptop or second phone, and note the validity period and activation window. For a short trip, a small fixed-data plan may be enough; for a longer stay or heavy map use, a larger allowance is easier. Also check installation timing—some plans should be installed just before travel, not weeks earlier—and whether support is available in your time zone.
How do I install it and fix common issues?
Buy the plan, install the eSIM while you have reliable Wi-Fi or internet, label it clearly, and leave it switched off until you need it. After landing, enable the line, select it for cellular data, and follow the provider’s instructions for any roaming or APN settings. If you see no signal, confirm the eSIM is turned on, restart the phone, and check that the data line is set correctly. Before you commit, confirm the plan’s supported devices and activation timing.
What should you compare before buying a Japan eSIM?
Once you've confirmed your phone supports eSIM, the real work starts: comparing plans on the things that actually change your trip. A cheap 3 GB plan is a bad buy if the data expires in five days and your trip lasts twelve. A generous plan is useless if your phone is carrier-locked or the activation window has already closed before boarding.
Data allowance and speed policy. Check the total gigabytes, the validity window, and whether daily speeds are throttled after a threshold. Many plans marketed as unlimited slow down noticeably after a set daily cap — fine for maps and messaging, less fine for uploading video. Match the size to your habits: a short city break with hotel Wi-Fi needs far less than a two-week rail trip where you're booking trains and calling ryokan from the platform. For help judging eSIM against a physical SIM, the eSIM vs physical SIM comparison covers the trade-offs in plain terms.
Activation timing and installation. The single most common pre-departure mistake is installing at home and letting the validity clock run. Look at when the plan starts — on installation, on first network connection in Japan, or on a fixed date — and whether the QR code can be reused or only scanned once. Note the installation steps and whether the provider offers a manual fallback if the QR code fails.
Coverage, hotspot, and support. Confirm which Japanese networks the plan roams on and whether tethering is allowed, since a hotspot for a travel companion can matter more than raw data volume. Then check support hours against your arrival time in Tokyo — a 2 a.m. landing with a dead data connection is a poor start. Read the provider's troubleshooting page before you fly, not after.
A quick decision checklist: short trip, light use — small plan, check expiry covers your dates; two weeks or more — larger allowance or a plan with a long validity window; heavy use or work — verify hotspot rules and throttle limits. Keep your phone model and arrival date in front of you while you compare, and check compatibility and activation timing before you commit. Since prices and inclusions change, confirm the current terms on the provider's own page rather than relying on a comparison from last year.
How much data do you need for a short trip or longer stay?
Start with a rough daily baseline, then multiply it by your itinerary. A normal sightseeing day — map lookups, train timetables, messaging home, a handful of photos, a restaurant search — usually lands somewhere between 300 MB and 500 MB. Treat that as a working estimate rather than a guarantee: the number moves with how much you upload and whether you tether. Travelers who mostly read and navigate sit at the low end; anyone posting video sits well above it.
For a short trip of three to five days, 3 GB to 5 GB covers that light pattern comfortably. Add a laptop tethered for email, cloud photo backups, or an evening of streaming, and you should be comparing 10 GB plans or an unlimited-style option instead. A long weekend in Tokyo with heavy phone use can eat more data than a week of careful use in the countryside.
Stays of two weeks or more shift the math again. Ten to twenty gigabytes suits most people who mix hotel Wi-Fi with mobile data, and it is worth checking whether a plan throttles after a daily cap. Hotel and café Wi-Fi is common in Japanese cities, but it is rarely quick enough to trust with a full camera card upload — keep the big transfers for your accommodation and save mobile data for the street.
Watch the quiet drains. Automatic photo and video syncing, app updates over mobile data, and hotspot tethering are what turn a 5 GB plan into a problem by day four. Media shared through social apps is served from content networks such as fbcdn.net, and a single album can cost a few hundred megabytes. Download offline maps before you fly, switch off auto-upload until you are on Wi-Fi, and glance at your usage counter each morning so there are no surprises.
If you would rather not do the arithmetic, compare Japan eSIM plans by duration and data allowance, then match one to your itinerary. Check device compatibility and activation timing on the plan page before you buy, so the data you paid for is ready the moment you land.
International eSIM, Carrier Roaming, or Physical SIM: Which Option Fits Your Trip?
Three routes get a traveler online in Japan, and each one gives out in a different place. Carrier roaming is the easiest to switch on and the most expensive to leave running. A physical SIM is the most familiar and the least convenient to buy on arrival. An international eSIM sits between them: nothing to collect, no tray to open, but it only works if you install it before you fly.
Roaming through your home carrier keeps your number live and skips setup entirely — useful if you land at Haneda at midnight and need a ride. The trade-off shows up on the bill: a daily or weekly pass looks reasonable until a 12-day trip turns it into a line item bigger than a regional rail pass. Speed also depends on which partner network resources your home operator has agreements with, and tethering limits come from your carrier, not from the Japanese network you're actually using.
A local physical SIM buys you local pricing but charges you in time. Airport counters and electronics shops near major stations sell them, registration generally requires your passport, and you surrender your home SIM slot — so anyone calling your regular number reaches voicemail instead of you. If you need to react to bank alerts or family messages, that gap matters more than the savings.
An eSIM keeps your home line active for calls and texts while a second plan handles data. The price of that convenience is compatibility: you need an unlocked phone with eSIM support, and you need working Wi-Fi to install the profile before departure.
Which international eSIM providers are best?
There's no single winner, because the right pick depends on how you travel. Score any provider on five things: which Japanese networks the plan connects to, whether the data allowance is total or resets daily, how long the plan stays valid after first activation, whether hotspot use is permitted, and how quickly support answers when something breaks at 11 p.m. in Osaka. Providers that publish specifics — validity window, activation rules, supported device list — are easier to trust than ones showing only a headline price. Match those details to your itinerary before you commit.
Could Safari eSIM’s Japan plan meet your travel needs?
SafarieSIM’s Japan product is worth weighing if you want service sorted before you fly and no SIM-shop detour after landing. Entry pricing is listed from $9.99 a day. Judge it on what the listing actually states — supported models, activation timing, allowance, validity, network access, tethering terms and the support contact — with your own handset nearby.
Start with the handset. It must support eSIM and be carrier-unlocked; a model bought on installments can still be tied to its original carrier. The product page says most models from 2019 onward qualify, but verify your own rather than assuming, and check the supported-device list before paying.
Three to seven days of maps, messages and the occasional photo upload rarely calls for a large allowance. A longer stay or remote work changes the arithmetic: weigh the allowance and validity against your daily habits, because video calls, cloud backups and tethering add up. If you expect to stream or work most days, buy more headroom than instinct suggests.
Setup is described as taking about two minutes: pay, receive the QR code by email almost at once, and scan it with stable Wi-Fi in reach. Name the line clearly and keep your usual SIM live for calls. After landing, follow the provider's notes for enabling the line and roaming, then point cellular access at it and load a map before relying on it for directions.
If nothing works, check that the right line is selected, restart the handset and review any access-point details supplied with the profile. Save the support contact before departure: help runs seven days a week and the page carries a 30-day money-back guarantee, though response hours matter most when you are in a station trying to get online.
How Do You Install and Activate a Japan eSIM at the Right Time?
Install over reliable Wi-Fi before you fly, label the line clearly, and leave it off until you land.
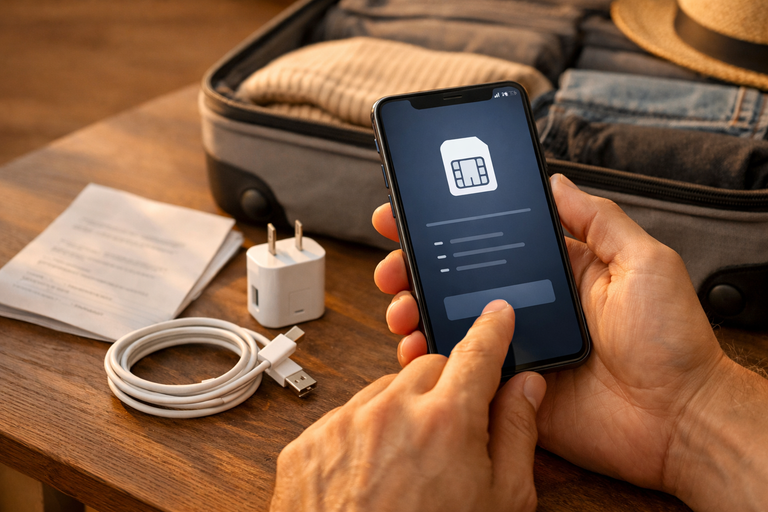
Install the eSIM on reliable Wi-Fi before travel, then enable the Japan data line after landing.
The install takes a few minutes. Scan the QR code or enter the manual details in your phone's cellular settings — look for an “Add eSIM” or “Add SIM” option under Cellular, Mobile Data or SIM management; the menu path and labels vary by device and software version. Label the line “Japan,” keep your home line active for calls and texts, turn off data switching, and set the Japan line as the default for cellular data. Enable roaming on that line only if the plan requires it.
After landing, turn off airplane mode, enable the Japan line, and give it one to two minutes to find a connection. Test it with a map or a basic website. If nothing loads, toggle airplane mode, restart the phone, confirm roaming is on for the Japan line, and check the APN details in your setup email. If your provider sends a manual setup page—even one with extra link parameters like rsrc php—open it in your phone browser, not an in-app preview.
If the line still will not connect after 10–15 minutes, contact the provider with your order details before buying another option.
Which Japanese networks does SafarieSIM use?
The listing names KDDI/au, NTT docomo, Rakuten Mobile and SoftBank, so the profile can fall back to another carrier where one signal drops.
5G and 4G coverage in Japan
SafarieSIM cites 99.9% population coverage, with 5G in major cities and reliable 4G including rural areas.
Can I use hotspot in Japan?
Tethering is listed as included, so a laptop or a companion's handset can share the allowance. Confirm it on the page before paying, since permission is set per product, not per country.
Unlimited data and Fair Use Policy
The product page advertises unlimited data at 4G/5G speed. Fair Use Policy terms may still apply, and some operators throttle speeds after heavy usage — worth reading if you stream or tether all day.
When does a Japan eSIM activate?
On arrival, not at purchase. The profile can sit installed and idle for a while, so loading it before you fly does not eat into its validity.
How to use the Japan coverage checker
Enter a hotel, lodge, park or address on the product page to see the likely network and speed at that spot — useful before committing to a rural stretch of the route.
What Should You Do if Your eSIM Will Not Connect in Japan?
Start with the simple switches before you assume the plan is faulty. Open your phone’s cellular settings and confirm the Japan eSIM line is turned on, that mobile data is assigned to that line, and that data roaming is enabled if your provider requires it for travel. Toggle airplane mode on for about 10 seconds, then off, and restart the phone. If you are indoors or underground, move to a window or street level; a new line can take a few minutes to register on a local network, especially during the first hour after activation.
If the line shows bars but no internet, check the access point name (APN). Many travel eSIMs configure it automatically, but some require a manual APN that your provider supplies. Enter it exactly as given—do not guess—and leave other fields alone unless support tells you otherwise. Then set network selection to automatic. If that fails, try a manual scan and pick an available carrier, but avoid locking to a network you cannot use. Keep the eSIM installed while you troubleshoot; deleting it can make reactivation harder.
Installation problems are often browser problems. If a QR code will not scan, request the manual activation details and enter them on a stable Wi-Fi connection. A failed image or script on a support page—sometimes reported as an fbcdn net rsrc resource error—usually means the page could not load content from a CDN, not that your eSIM is broken. Try another browser or network. It also helps to know how an eSIM differs from a physical SIM when you are checking device settings; our eSIM vs. physical SIM comparison walks through those basics.
If nothing changes after 15–30 minutes, contact your provider’s support with useful details: order number, phone model, the exact error message, a screenshot, your location, and the time you first noticed the issue. Ask whether the plan has finished provisioning and whether your handset is compatible. Test the eSIM during your arrival days, while airport Wi-Fi is available, rather than waiting until you need a map. A support agent can usually tell you faster whether the issue is coverage, settings, or a plan that needs to be reissued.
A few practical questions come up again and again before a trip. Here are direct answers to the ones travelers ask most often when they are comparing Japan eSIM options.
Can I use international roaming in Japan?
Yes, if your home carrier includes Japan in its roaming agreement — but it is rarely the cheapest route. Roaming usually runs on a per-day pass or a surcharge model, and some carriers slow speeds after a daily data cap. Check your carrier's Japan rates before you fly, and remember that a travel eSIM works as a separate data line alongside your normal number, so you can keep roaming switched off for data and use the eSIM instead.
Can I share my Japan eSIM data as a hotspot?
Sometimes. Hotspot or tethering permission is set per plan, not per country, so confirm it in the plan details before you buy if you plan to work from a laptop or share data with a travel companion. Data used through tethering comes out of the same allowance as data used on the phone itself.
Does a Japan eSIM include a Japanese phone number?
Most travel eSIMs sold for Japan are data-only, with no local number attached. That is fine for maps, translation, and messaging apps, but it will not help if you need a number for a restaurant booking or a parcel delivery. If a voice number matters, look specifically for voice-capable plans rather than assuming every eSIM includes one.
How long is a Japan eSIM valid, and can I top it up?
Validity usually starts when the eSIM first connects to a Japanese network, not on the day you buy it — which is why activating on arrival at the airport is often the sensible move. Some plans run for a fixed number of days, while others allow a top-up when your data runs low. Check whether your chosen plan can be recharged or whether you would need to buy a second plan for a longer stay, and keep an eye on your data counter so you are not caught short.
What support should I expect if something goes wrong?
Look at the support channels and response hours before purchase, and keep your order confirmation and installation QR code somewhere you can reach offline. If your plan will not connect, the fix is usually a manual network selection or an APN check rather than a new purchase. You can review the Safari eSIM Japan plan to compare its data options, compatibility notes, and activation steps before you commit. For anything else, contact the provider directly with your order details in hand — clear context gets faster answers than a general "it does not work" message.
